The winter months for those in the Northern Hemisphere, especially after the rush of the holidays, can be a downright depressing time. For many people it’s also a very busy time, filled with deadlines and demands as we head back to work after the holidays. Add in bad weather, rain and snow, and the early months of the year can be downright stressful. For photographers like myself, this is certainly the case, and I often experience a creative “dark ages” while waiting for the renaissance of spring

Film photographers cope with this time of year in many different ways. Some retreat to the darkroom or studio hoping to get caught up on developing or printing. Others get more focused on shades of gray, ten to be precise, deciding that the winter months are a good time to shoot black and white film. I’m no different, of course, and I’ve burned through some Tri-X and spent some time making prints but I also used this time to try some new things, including something called “redscale”. It turns out that redscale is a lot of fun, helping me turn some dull winter grays into a jarring color explosion of red and yellow.
So what is “redscale”? I always knew it was film that produced red tinted images and I also knew that Lomography makes a film called Redscale that allows you to create these images. What I didn’t realize is that you can use any color film to produce redscale images, even slide film. One recent day, with a snowstorm keeping me housebound, I spent some time reading up on redscale to learn what it is and how it works. I discovered some interesting things, and I thought I’d share them here along with a few examples from a walk around my neighborhood creating some redscale images.

So what exactly is redscale? As mentioned, you can create redscale images with any color film including both negative and positive films. To do this, you simply need to load the film into the camera with the base facing toward the lens and the emulsion facing away. There are several ways to do this, which will be discussed shortly.
The theory behind redscale is interesting; it was pretty much discovered by accident when sheet film photographers accidentally exposed their film backwards in the camera. To fully appreciate what is happening requires some understanding of how color film normally works. While a simplification, in general, color film is made up of three layers, each sensitive to a different color of light. These layers consist of a blue light sensitive layer, a green sensitive layer, and finally a red layer in the back. In between these layers are color couplers which react with the developer when processed, and this all sits on the film base at the very back behind the red layer. There is also a filter behind the blue layer, since all layers are somewhat sensitive to blue light. When the film is the developed, the couplers for each layer react with the developer and the respective layer creating the colors in the final negative. In simple terms, the blue layer turns yellow, green to magenta, and red to cyan, creating the color negative which sits on the orange base layer of the film.
The idea behind redscale photography is to reverse the layers in camera, placing the base of the film toward the lens, then the red layer, then green, then blue. Light coming through the lens will now hit the base first and then the red, green, and finally blue emulsion layer in that order. Because the filter is now in front of the blue layer, very little light actually gets to the back where the blue layer now resides. The result is a strong red color shift that can move towards yellow based on the amount of overexposure. In general, shooting a stop or two over box speed will result in very red images with additional exposure turning those same images more yellow.

Flipping the film is fairly easy. While there are several ways people do this, I chose a method that seemed the easiest. I went into the darkroom with a roll of Fuji Superia Xtra 400, some scotch tape, and a pair of scissors. I pulled all the film out of the canister and cut it about two inches up from the canister opening. I then flipped it over so the back now faces the front and then carefully re-taped the film to the two inches still on the canister spool, and then rewound the film back into the canister leaving a leader so I could load my camera as normal, in this case, a Nikon F100. This particular camera was actually hard to load since the film now wanted to curl up and away and this particular model does not have a take up spool, but rather a place where the film tip lies before the camera takes it up when you close the back. After a few tries, I was able to get it to load, but next time, I will probably use a camera where the leader is actually placed into the takeup spool manually.
I chose the 400 speed film, because everything I read indicated that I should overexpose by at least 2 stops. This makes sense since the base now the first thing the light hits when the shutter opens. With 400 speed film, there is room to shoot at ISO 100 or even less for more overexposure. In this case, since I was just starting, I went with two stops of overexposure shooting the roll at ISO 100, but in the future, I might try 50 or 25 to see if more colors come through, with the goal of having yellows and even some blues appear.
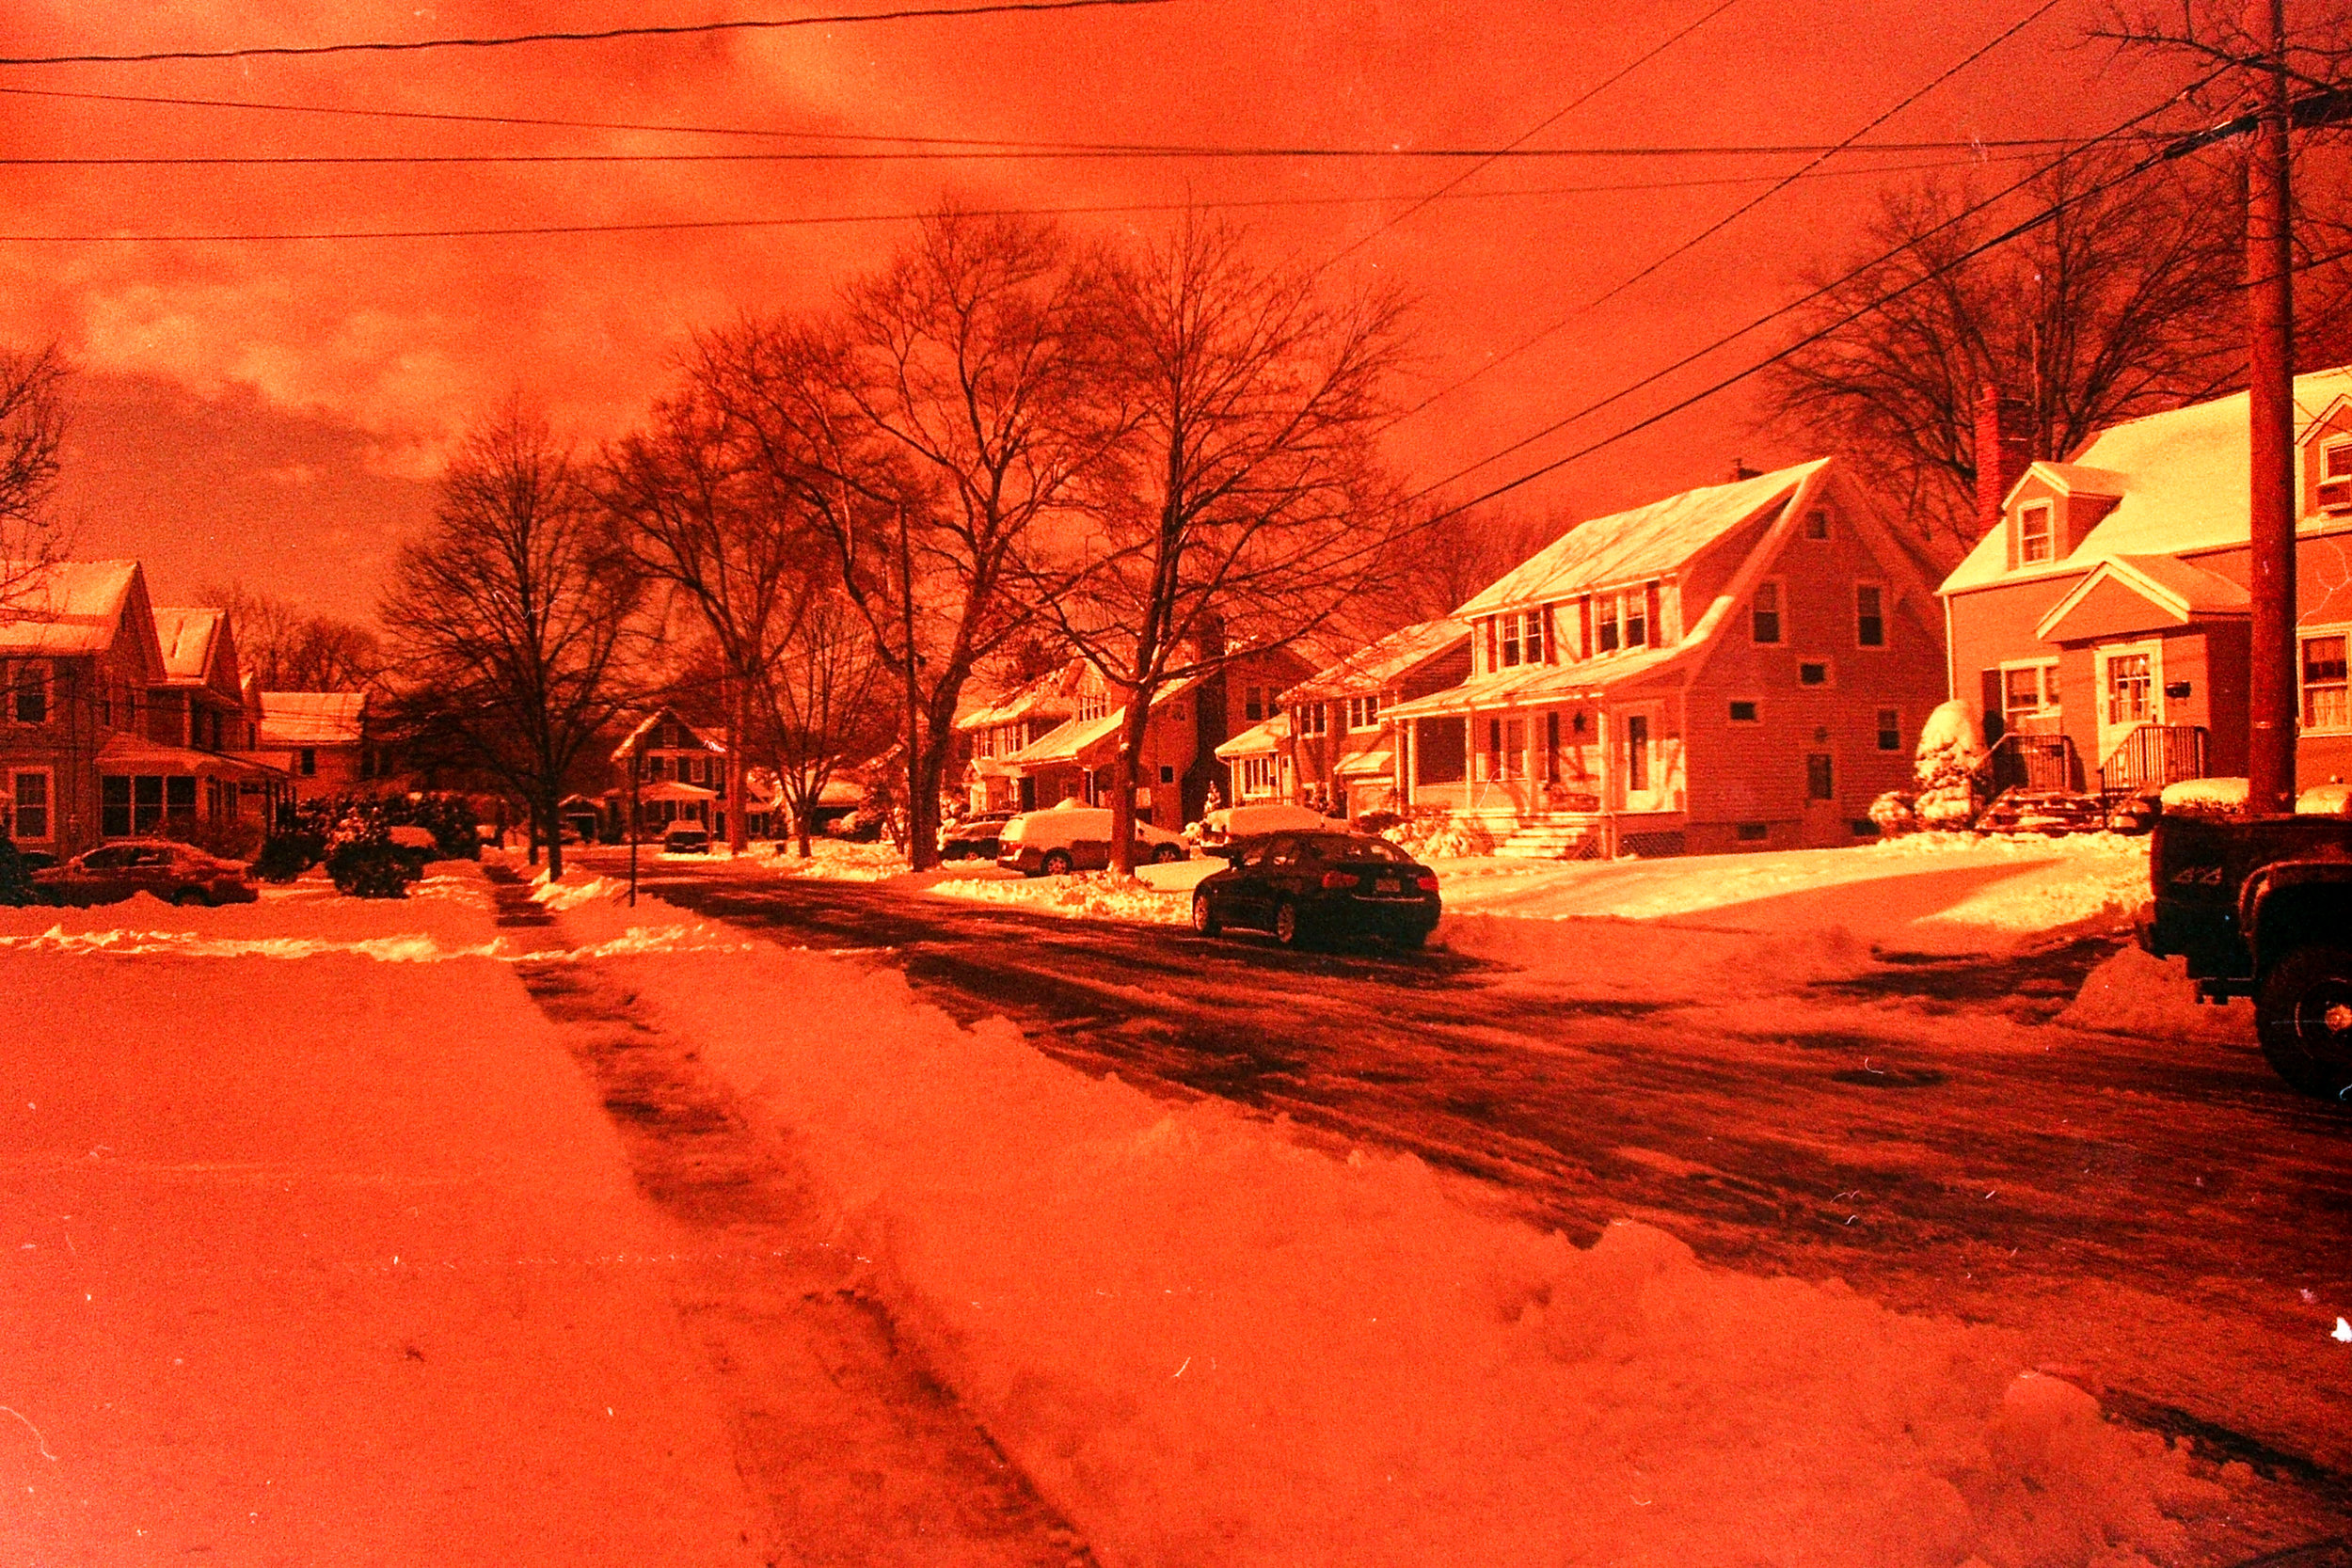
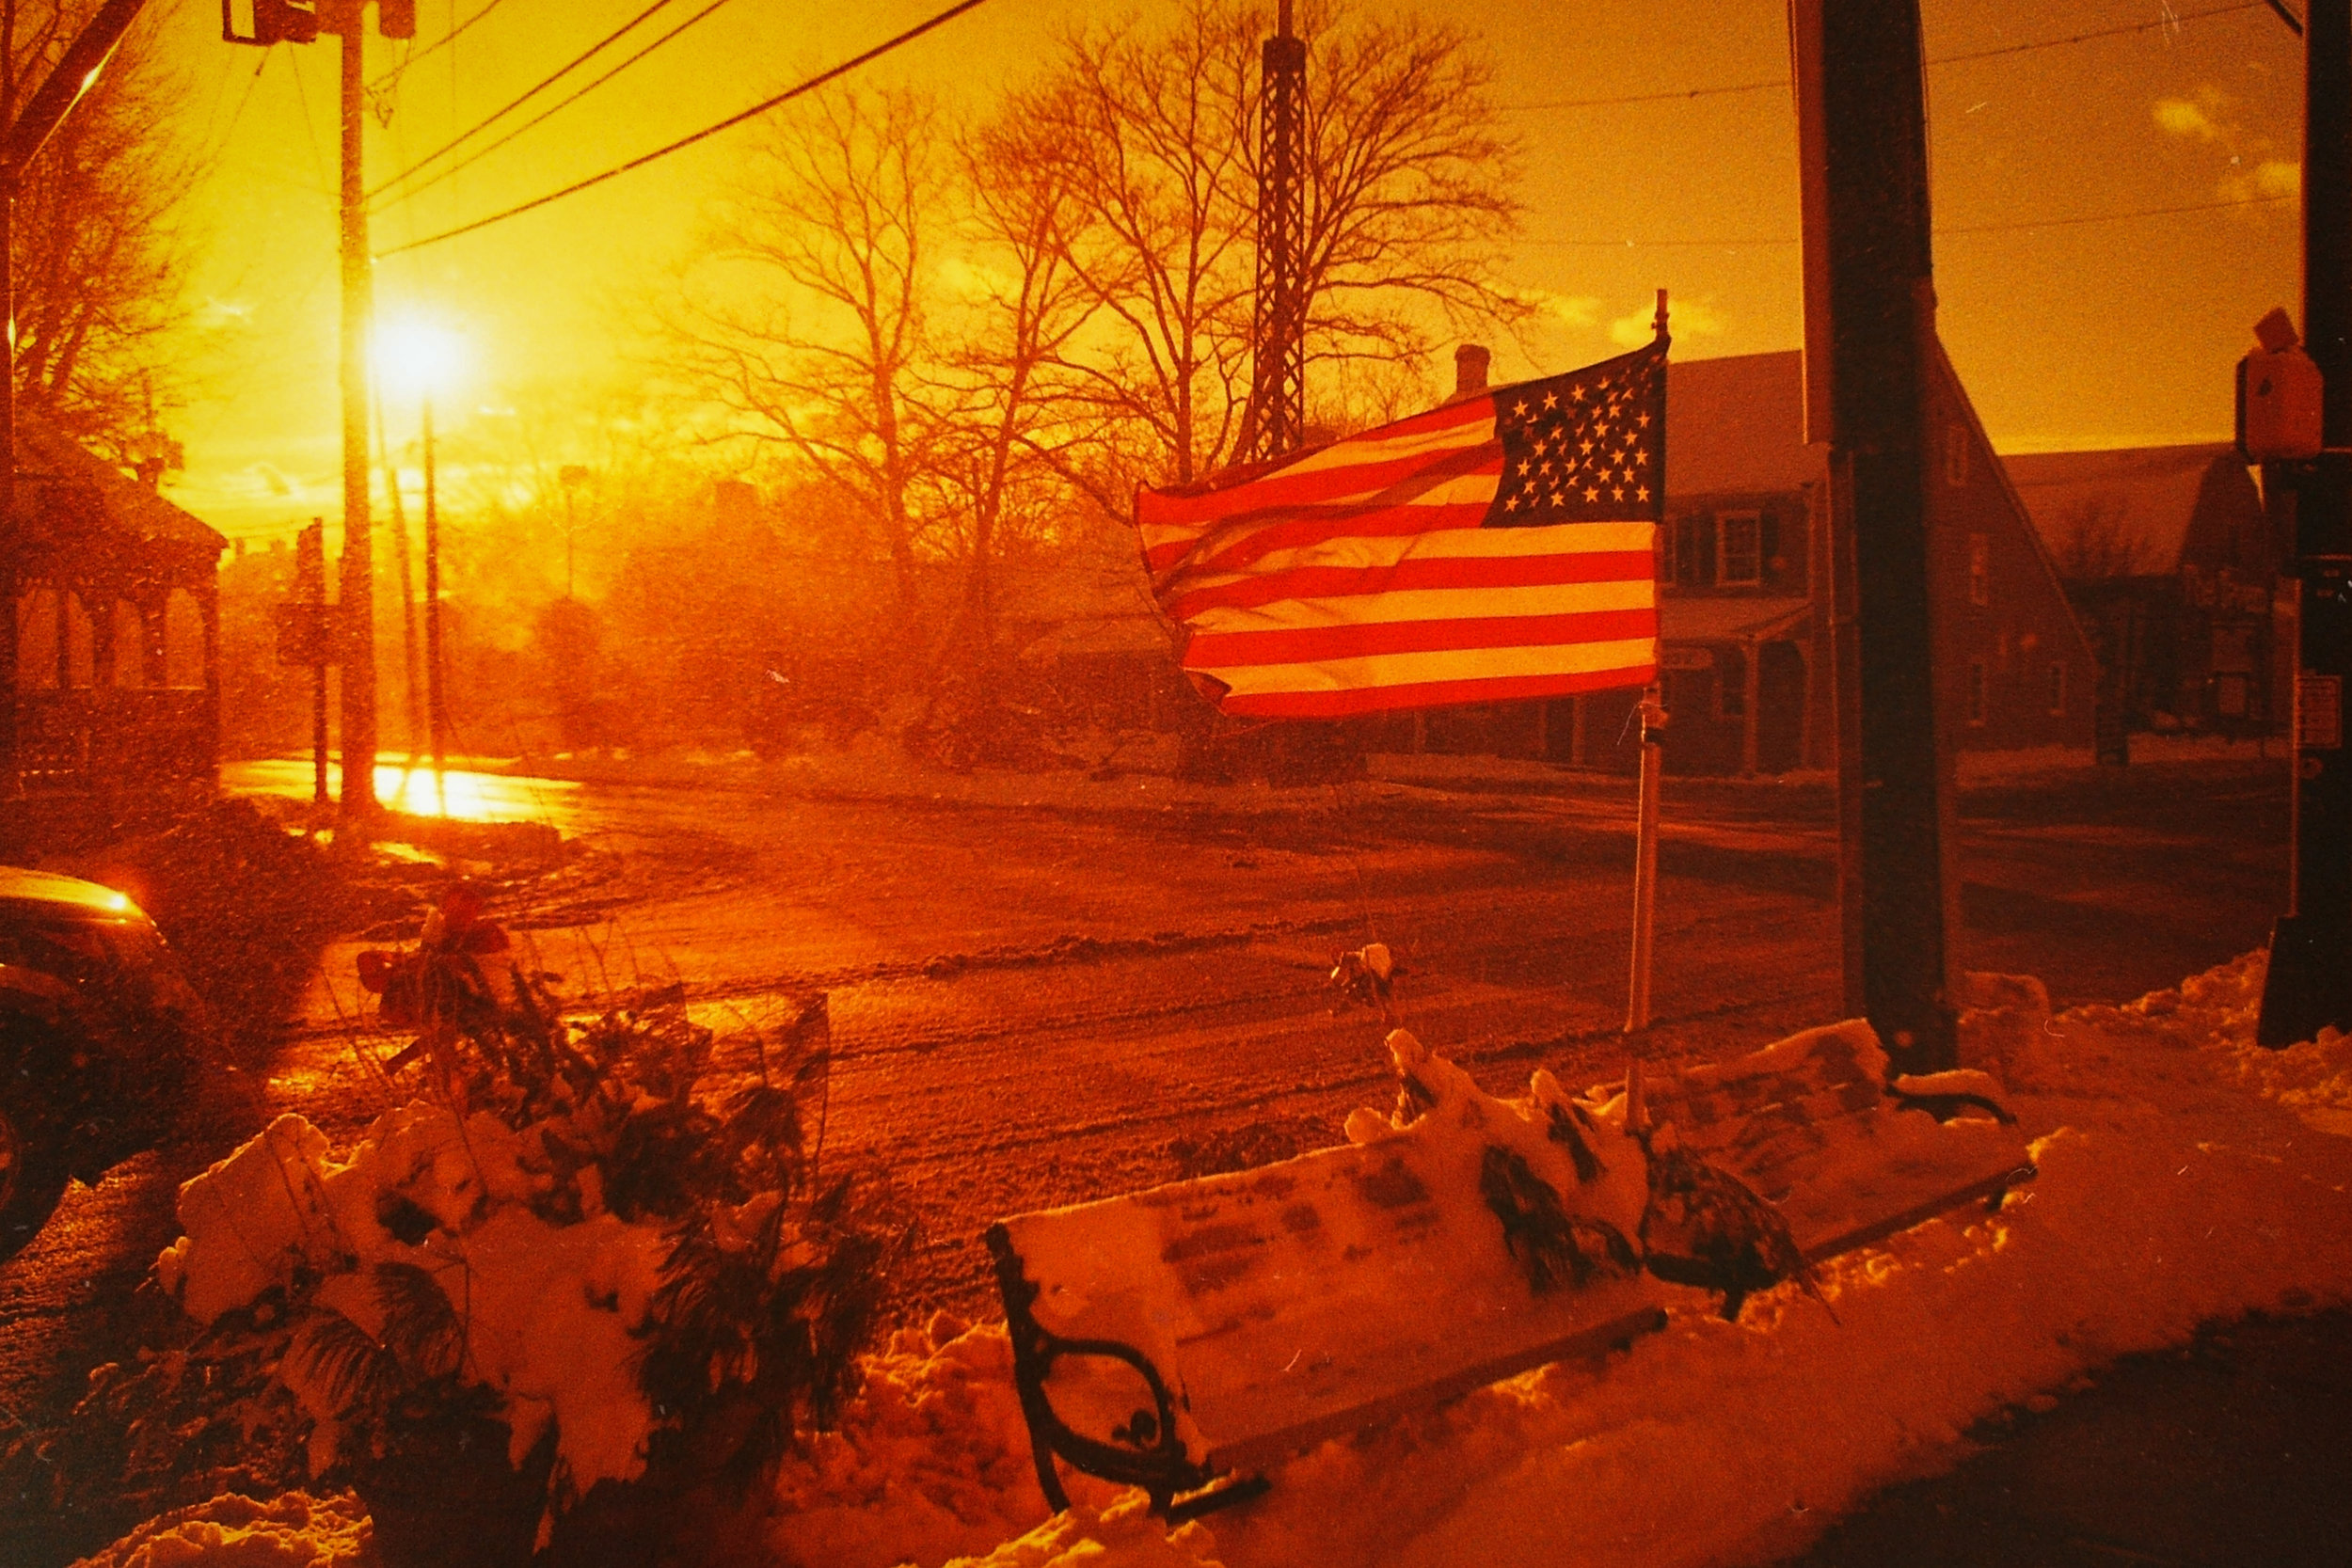
Once I loaded my backward film, I went for a walk as the snow was ending. I got some crazy images that made my little town look like a very different place. Instead of spending another day suffering from the winter blues, I realized that for just a short time, I had traveled to the “Red Planet”. When I finished processing the film with a unicolor kit, I was pretty amazed to see the results. If you haven’t tried this, give it a shot. Redscale is a fun and creative project especially when you’re looking to liven things up in the dead of winter.

Connect
Film photographer Tony Klimas is based in the North Eastern United States. See more of his work on his website.